 By Emily Parker
Updated November 2026
The best toddler bike attachment is the one that fits your bike, your child’s size and the way you actually ride. In this guide, you will learn what a bike attachment does, how to match one to your setup, the safety checks that matter most and the mistakes dads make when adding one. By the end, you should be able to pick a option with confidence and get it mounted correctly the first time.
What a Toddler Bike Attachment Actually Does
A toddler bike attachment is any add-on that lets a young child ride with you or helps them ride on their own while they build skills. That can mean a tow bar that connects a child’s bike to yours, a rear seat that lets a little one ride behind you, a handlebar accessory that gives them more control, or a set of training wheels or stabilizers that keep a small bike upright. Each type solves a different problem, so the first step is deciding which problem you need to fix.
Shopping for one? See our guide: 9 Best Balance Bikes for Toddler Picks for Every Need (2026).
Most dads land on one of three goals. The first is getting a toddler who is not yet pedaling along on family rides. The second is helping a new rider learn balance and steering. The third is making a bike feel more secure, with better grip, a better seat or a stronger connection point. If you know which goal you are chasing, the shopping list gets much shorter.
Step 1: Confirm Your Child’s Size and Readiness
Before you buy anything, measure your child. Manufacturers usually list an age range and a height range, and those numbers matter more than the age on the box. A rear-mounted seat, for example, typically has a maximum weight limit and a head-clearance requirement. Most rear seat makers specify a maximum child weight somewhere around 40 to 50 pounds, but check the exact figure printed on the product you are considering.
Next, check whether your child can sit upright unassisted and hold their head steady for the length of a typical ride. If they cannot, a rear seat is premature, and a tow bar or trailer may be a better fit. Consult your pediatrician if you have concerns about your child’s development or physical readiness for riding.
Quick Readiness Checklist
- Child is within the manufacturer’s height and weight range
- Child can sit upright without slumping for 15 to 20 minutes
- Child can keep feet clear of spokes and wheels
- Child wears a properly fitted helmet every ride
- You have confirmed the attachment is compatible with your bike’s frame and wheel size
Step 2: Match the Attachment Type to Your Bike
Compatibility is where most purchases go wrong. A rear seat that clamps to one frame style may not fit another. Tow bars often require a specific hitch point, and some attachments only work with certain axle or seat post diameters. Measure your frame tubes and check the attachment’s listed fit range before ordering.
| Attachment Type | Best For | Main Limitation |
|---|---|---|
| Rear mounted child seat | Toddlers who can sit upright and hold on | Adds weight and changes handling; frame fit is critical |
| Tow bar | Young kids on their own bike during family rides | Requires a compatible hitch and a child who can steer |
| Training wheels or stabilizers | New riders learning to pedal and steer | Can encourage leaning if not adjusted correctly |
| Handlebar accessories | Improving grip, comfort and control | Does not solve balance or stability on its own |
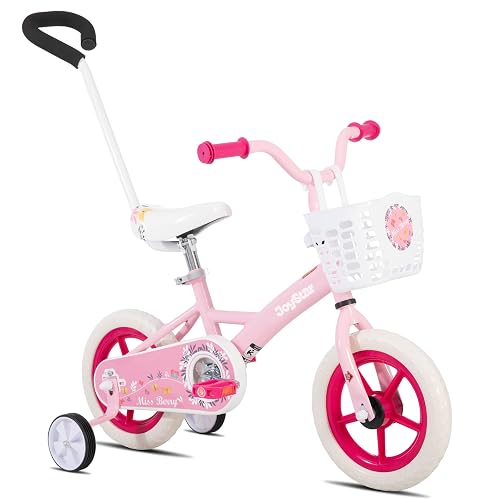
If you are looking at a specific child bike, it helps to know the common setups. For example, many riders start with a child’s bike that already includes training wheels, so an extra attachment may be unnecessary. You can compare options in our roundup of Pink Toddler Bike With Training Wheels: 5 Best Picks for Little Riders (2026) if you are shopping for a bike that already has stabilizers built in.
Step 3: Check Safety Features Before You Ride
Safety is not optional with any attachment. Look for a clear locking mechanism, a stable mounting point with no wobble, and a guard or shield that keeps little feet away from moving parts. For tow systems, the coupling should release quickly in an emergency and should not depend on the child to hold it.
Helmets matter just as much as the attachment. A helmet should sit level on the forehead, with the straps forming a V under the ears and the buckle snug under the chin. Many dads pair their setup with knee pads and gloves, especially for early falls. You can browse a complete set in Top 8 Toddler Bike Helmet and Knee Pads Sets for Young Riders.
Pre-Ride Safety Checks
- Tighten every bolt and clamp, then check again after the first 10 minutes of riding.
- Confirm the attachment does not rub the tire, chain or brake cable at full turn.
- Test the release mechanism and make sure it works without tools.
- Check tire pressure on both bikes if you are towing.
- Walk the route first to spot curbs, gravel and steep driveways.
Step 4: Install the Attachment Correctly
Most attachments install in under 30 minutes with basic hand tools, but rushing the job is how parts come loose. Lay out every piece, read the manual once from start to finish, and set aside time to do it without interruptions. Keep the manufacturer’s torque specification in mind if one is listed, and never overtighten plastic components.
Once installed, do a slow test in a parking lot or driveway. Turn left and right, stop hard and check that nothing shifts. Ride a short loop before attempting a longer trip. If the bike feels unstable or the attachment makes a click, rattle or grinding noise, stop and inspect the connection points.
Tools You Will Typically Need
- Allen (hex) key set in common metric sizes
- Adjustable wrench or socket set
- Small amount of threadlocker for bolts that vibrate loose
- Tire pump with a pressure gauge
- Clean rag for wiping mounting surfaces
Step 5: Teach Your Toddler to Ride Safely With It
Even the best attachment does not replace good habits. Start in a flat, empty space and keep sessions short, around 10 to 15 minutes, especially at first. Talk through the basics: where to look, how to brake and why feet stay on the pedals or footrests. Keep your voice calm and encouraging, because toddlers pick up fear quickly.
If you are teaching balance rather than towing, a dedicated balance bike may build skills faster than any add-on. Our guide to Early Rider Balance Bike: 5 Best Picks for Toddlers (2026) covers what to look for in that category.
Common Mistakes Dads Make
- Buying an attachment before checking the frame or wheel compatibility
- Skipping the post-install bolt check, which is where most loosening happens
- Letting the child ride longer than their attention span allows, leading to sloppy steering
- Ignoring the weight limit because the child “looks big enough”
- Forgetting that a rear seat changes braking distance and balance for the adult rider
Recommended Gear
Recommended gear for this kind of setup usually includes a sturdy helmet, a basic tool kit for checking connections, and a quality bike pump. These items help you keep the attachment secure and the ride safe from the first day.
- Toddler bike helmet with adjustable fit helps ensure a snug, level fit on a wiggly head. View on Amazon
- Hex key set in metric sizes makes it easy to tighten clamps and check bolts after installation. View on Amazon
- Bike floor pump with pressure gauge keeps tires at the right pressure for stability when towing or riding behind an adult. View on Amazon
FAQ
What is the best toddler bike attachment for a 2-year-old?
For most 2-year-olds, a tow bar or a handlebar accessory is more practical than a rear seat, since many children at that age cannot yet sit upright reliably. Check the manufacturer’s minimum height and weight before buying.
Can I attach a child seat to any bike?
No. Frame type, seat post diameter and rear rack or axle design all affect compatibility. Always confirm the fit range listed by the manufacturer and measure your frame before purchasing.
How often should I check the attachment?
Check bolts and clamps before every ride for the first few weeks, then at least once a week after that. Vibration can loosen connections over time.
Do toddlers need a helmet when riding with an attachment?
Yes. A properly fitted helmet is essential whenever a child is riding, whether on their own bike or behind an adult.
Is a tow bar safer than a rear seat?
Neither is automatically safer. A tow bar keeps the child on their own bike, which builds skills, while a rear seat keeps them fully supported. The right choice depends on your child’s abilities and your bike’s setup.
When should my toddler stop using an attachment?
Stop using a rear seat once your child reaches the weight or height limit, or once they outgrow the head support. Transition to their own bike when they can pedal, steer and brake with control.
Should I consult a professional before installing an attachment?
If you are unsure about mounting or frame compatibility, a local bike shop can inspect the setup and tighten connections correctly. For any concerns about your child’s physical readiness, consult your pediatrician.
Conclusion
The best toddler bike attachment is the one that matches your child’s size, your bike’s frame and the kind of riding you plan to do. Confirm readiness first, check compatibility carefully and run through the safety checks before every ride. With a secure setup and short, positive sessions, your little rider will be on the road sooner than you expect.
Ready to choose one?
About Emily Parker
Emily Parker is part of our editorial team and reviews and edits our dad-focused parenting guides, checking product details against manufacturer specifications and owner feedback.