By Emily Parker
Updated November 2026
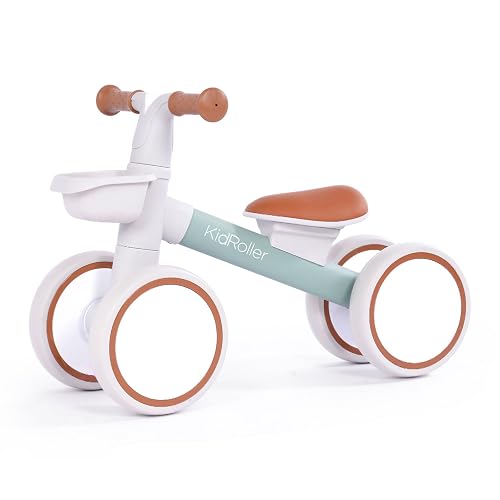
A balance bike from Decathlon India is a solid starting point for a toddler who is ready to learn to balance and steer before pedals ever enter the picture. In this guide you will learn how to check sizing, what to look for in the frame and wheels, and how to tell whether a given model suits your child. You will also see a few setup habits that save frustration in the first few weeks.
Step 1: Check Your Child’s Inseam and Standover Height
Sizing matters more than brand or color. The seat should be low enough that your kid can sit with both feet flat on the ground, with knees slightly bent. A good rule of thumb is that the seat height should be close to the inseam measurement, measured from the crotch down to the floor while your child stands barefoot.
Shopping for one? See our guide: Woom 1 Balance Bike Review: Is It Worth It?.
Also check standover height. Your toddler should be able to straddle the frame with a few centimeters of clearance between the crotch and the top tube. If the bike feels tall when they stand over it, choose a smaller size or lower the seat.
Step 2: Look at the Frame, Wheels and Brakes
Most balance bikes sold in this category have no pedals and no chain, which is the point. Focus on these details:
- Wheel size: Smaller wheels suit younger riders; larger wheels roll more smoothly but raise the seat.
- Tires: Foam-filled or air tires are common. Air tires grip better outdoors; foam is less prone to flats.
- Brakes: Many balance bikes rely on a rear hand brake or foot brake. Test that your child can reach the lever comfortably.
- Handlebar height: It should sit roughly at chest or belly level when your child is seated, so their arms stay relaxed.
Step 3: Set Up the Bike Before the First Ride
Assemble the bike on a flat surface and tighten every bolt with the included tools. Check the headset for play by holding the front wheel between your knees and gently rocking the bars. Adjust the seat and bars, then do a quick walk-through so your child learns how to stop.
- Set the seat so your child’s feet are flat with knees slightly bent.
- Adjust the handlebar height to chest level.
- Pump tires to the pressure printed on the sidewall, if they are air-filled.
- Test both brakes before the first ride.
Step 4: Practice Balance in Short, Safe Sessions
Start on a flat, grassy or smooth area with no traffic. Let your toddler scoot with both feet, then lift them to glide. Keep sessions to 10 to 15 minutes at first. Walk alongside, hold the back of the seat lightly and let go as soon as they start gliding on their own.
Recommended gear
For practice, a helmet that fits snugly and a pair of knee pads make the first falls far less worrying. Check the helmet’s fit by making sure it sits level and does not shift when your child shakes their head.
Recommended gear
- Kids’ bike helmet: A properly fitted helmet is the single most important accessory, and youth-sized models are widely available. View on Amazon
- Knee and elbow pad set: Useful for early falls on pavement or gravel. View on Amazon
Common Mistakes to Avoid
- Buying a bike that is “big enough to grow into.” Oversized bikes make balancing harder and discourage kids.
- Pushing too early. Let your child lead the pace and move on when they are ready.
- Practicing on slopes or near roads before they can stop reliably.
- Skipping the bolt check after assembly, which can loosen during early rides.
FAQ
Is a Decathlon India balance bike suitable for a two-year-old?
Many toddlers start around age two, but readiness matters more than age. Check that your child can sit on the bike with feet flat and push with both legs before you begin.
How do I know if the seat height is right?
Your child should be able to put both feet flat on the ground while seated, with knees slightly bent. If they must stretch to reach the ground, lower the seat.
Do I need to wear a helmet on a balance bike?
Yes, a helmet is recommended from the first ride, even at low speed on flat ground. Check the manufacturer’s sizing guide and consult a pediatric professional if you have specific safety questions.
Conclusion
Choosing a balance bike comes down to sizing, a secure setup and short, fun practice sessions. Start with the seat height, check the brakes and keep early rides on safe, flat ground. Your toddler will progress faster when the bike fits them well.
Related reading
- Yvolution Y Velo Junior Balance Bike Review: Is It Worth It?
- Yvolution Velo Balance Bike vs Strider 12 Sport (2026): Which Is Better?
- YBIKE Pewi Balance Bike Review: Is It Worth It?
- Y Velo Junior Balance Bike Review: Is It Worth It? (2026)
- Woom vs Guardian Balance Bike (2026): Which Should You Choose?
Ready to choose one?
About Emily Parker
Emily Parker is part of our editorial team and reviews and edits our dad-focused parenting guides, checking product details against manufacturer specifications and owner feedback.