By Emily Parker
Updated November 2026
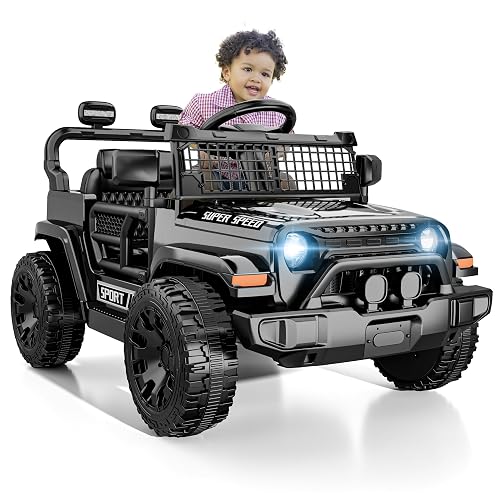
Decals for ride on toys are one of the easiest ways to give a plain ride-on a personality of its own. With a little prep and the right vinyl, you can add racing stripes, a truck number or your kid’s favorite character in an afternoon. This guide walks you through picking decals, prepping the surface, applying them without bubbles and keeping them looking good through sun, rain and sticky toddler hands.
Choose the Right Decal Material
Most decals for ride-on toys are made from vinyl, but not all vinyl is equal. Cast vinyl conforms better to curved body panels and holds up longer outdoors than thin calendered vinyl. Check the product listing for outdoor or weather-resistant ratings, and avoid paper-backed stickers meant for indoor use, which tend to peel within a few weeks of sun exposure.
Shopping for one? See our guide: 5 Best 24v Ride On Toys for Big Yards and Long Rides: Buyer's Guide (2026).
Also think about the finish. Matte vinyl hides small scratches and fingerprints better than glossy, while gloss looks sharper on a bright body color. Either works, so pick the one that matches the look you want.
Prep the Surface Before You Stick Anything
Surface prep decides whether a decal lasts a season or a single weekend. Ride-on bodies are usually plastic, and plastic often carries mold release agents and dust from the factory. Skipping this step is the main reason decals peel early.
- Remove the decal’s removable parts, such as the seat, wheels and any loose trim, so you have clear access to the body.
- Wash the area with warm water and mild dish soap. Rinse well.
- Wipe the spot with rubbing alcohol on a clean cloth, then let it dry fully for about 10 minutes.
- Check that the surface is smooth. If the plastic is textured or chalky from sun damage, a decal will bond poorly, so consider a different spot or a more flexible vinyl.
Apply Decals Without Bubbles or Wrinkles
Good application is mostly patience. Work in shade at a temperature around 60 to 80°F, since vinyl stretches badly in direct heat and stiffens in cold.
Positioning and Pressing
Lay the decal on the toy with the backing still on and use painter’s tape to mark its position. Peel back about two inches of backing, align that edge with your tape mark and press it down. Then peel the rest of the backing slowly while smoothing the vinyl outward from the center with a credit card or squeegee. Work from the middle toward the edges to push air out.
Fixing Bubbles
Small bubbles can often be pressed flat with a pin prick at the edge, then smoothed. For larger trapped air, lift the decal gently, reposition and try again. Don’t stretch vinyl around tight curves, because it will pull back over time.
Maintain and Protect Your Decals
Once the decals are on, a little routine care keeps them bright. Wipe them with a damp cloth every few weeks rather than scrubbing with abrasive pads. Pressure washers can lift edges, so keep the spray wide and at a distance. If you store the ride-on outside, a shaded spot or a simple cover helps extend the life of the vinyl.
Common Mistakes to Avoid
- Skipping the alcohol wipe, which leaves a film that blocks adhesion.
- Applying in direct sun, where the adhesive grabs too fast and vinyl stretches.
- Using indoor sticker paper outdoors, which fades and peels quickly.
- Placing decals across hinges, seams or areas that flex, where they crack first.
- Pressing too hard on textured plastic, which can crease the vinyl.
Recommended Gear
A squeegee or plastic scraper makes smoothing much easier than fingers alone, and a roll of painter’s tape keeps placement accurate. View on Amazon
Painter’s tape with a clean release helps you mark positions without leaving residue on the ride-on body. View on Amazon
A soft microfiber cloth is gentle enough for routine cleaning around vinyl edges. View on Amazon
If you are still deciding which ride-on to customize, our overview of Wiggle Ride On Toys: A Dad's Guide to Choosing and Using One Safely covers the features that matter most, and Ride-On Toys That Work on Grass: 6 Buying Factors for Dads (2026) helps if your yard is uneven. For tractor-style builds that suit decals well, see Tractor Ride On Toys: 6 Best Picks for Toddlers and Big Kids (2026).
FAQ
Can decals for ride on toys go on plastic that gets wet?
Yes, outdoor-rated vinyl handles water well once fully cured. Give the adhesive at least 24 hours before heavy rain or hosing the toy down.
How do I remove old decals without damaging the ride-on?
Warm the vinyl with a hair dryer on low, then peel slowly at a low angle. Remove leftover adhesive with a little rubbing alcohol or a gentle adhesive remover, testing on a hidden spot first.
Will decals affect the safety of a ride-on toy?
Decals themselves are generally fine, but never cover reflectors, labels with safety or age warnings, or any part that needs to be visible. Check the manufacturer’s guidance and consult a professional if you have doubts about a specific model.
Conclusion
Good decals for ride on toys come down to three things: durable outdoor vinyl, a clean and dry surface, and slow, bubble-free application. Take your time with prep and you will get a finish that looks good and lasts through the whole riding season. Your toddler will not care how straight the stripes are, but you will.
Ready to choose one?
About Emily Parker
Emily Parker is part of our editorial team and reviews and edits our dad-focused parenting guides, checking product details against manufacturer specifications and owner feedback.