By Emily Parker
Updated November 2026
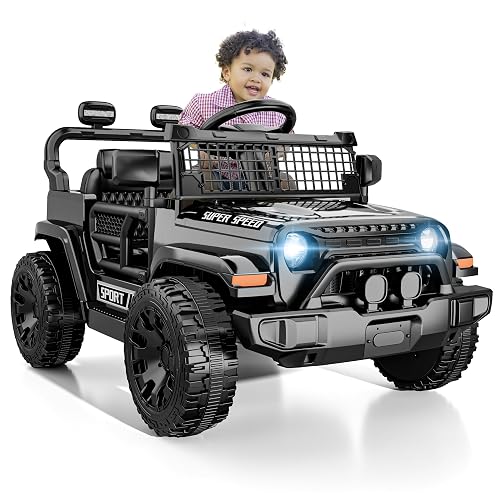
Electric ride on toys 12V models are the most common choice for toddlers and young kids, and for good reason. A 12-volt battery gives enough power for lawns, driveways, and gentle hills without the speed and weight of bigger systems. In this guide, you’ll learn how to check the voltage, match the toy to your child’s size and your terrain, and keep the battery healthy so it lasts through the season.
Step 1: Confirm the Voltage and Battery Type
Most 12V ride-ons use a single 12-volt sealed lead-acid battery, though some use two 6-volt batteries wired in series. Check the manual or product listing for the battery rating in amp-hours (Ah). A 12V 7Ah battery will generally run longer than a 12V 4Ah one, though actual runtime depends on weight, terrain, and throttle use. Manufacturers usually specify a rough runtime range, so treat it as a guideline rather than a promise.
Shopping for one? See our guide: Top 6 Childrens Electric Ride On Toys for Toddlers and Big Kids.
Step 2: Match the Weight Limit to Your Child
Every ride-on lists a maximum rider weight. Stay under it, because overloading strains the motor and gearbox and shortens battery life. Toddlers usually fit the smaller, slower models best, while older kids may need the higher-capacity versions. Look at seat height and pedal reach as well. Your child should sit comfortably with feet able to reach the floor or pedals.
Quick Fit Checklist
- Rider weight is below the stated maximum
- Seat height lets your child sit upright with feet planted
- Speed setting includes a low or “slow start” mode
- Parent remote control is included or available as an option
- Seat belt and wheel brakes are present
Step 3: Choose Based on Your Terrain
A 12V motor handles flat grass and paved driveways well. Thick mud, deep gravel, and steep slopes are harder on it. Owners often report better results on smooth surfaces, so if your yard is rough, look for models with wider tires and higher ground clearance. Test the route you actually plan to use. If the toy struggles on a light incline, expect the battery to drain faster.
Step 4: Set Up Charging and Storage Correctly
Charge the battery after every few rides and never leave it fully drained. Use the charger that came with the toy, or one specified by the manufacturer. Store the ride-on in a dry, shaded spot, and if you won’t use it for more than a month, top off the charge first. Lead-acid batteries lose capacity quickly when left flat. For charger options, see 6 Best 12V Battery Chargers for Ride On Toys (2026).
Common Mistakes
- Buying on top speed alone. A slower, controllable toy is safer for toddlers.
- Ignoring the weight limit, especially when a bigger sibling wants a turn.
- Leaving the battery dead for weeks at a time.
- Skipping the parent remote on a first ride-on, which removes a key safety feature.
- Assuming 12V is always enough for hills. Check the terrain first.
Recommended Gear
- A dedicated 12V charger matched to your battery type helps keep the battery healthy between rides. View on Amazon
- A parent remote control lets you stop the toy instantly if your child drifts toward a hazard. View on Amazon
FAQ
How long does a 12V electric ride on toy run on one charge?
Runtime depends on battery capacity, rider weight, terrain, and how often the throttle is held down. Manufacturers usually give an estimated range, and real-world use often falls within it on flat ground.
Is a 12V ride-on safe for a toddler?
It can be, when the toy matches your child’s weight and size and includes a slow-speed mode and a parent remote. Always supervise, and consult your pediatrician if you have questions about age suitability.
Can I use a car battery charger on a 12V ride-on?
Not safely in most cases. Car chargers often deliver too much current for a small sealed battery. Use a charger designed for your battery type and voltage.
Conclusion
A good electric ride on toy 12V setup comes down to four checks: voltage and battery rating, weight limit, terrain, and charging habits. Get those right and your toddler gets reliable fun without constant battery trouble. Start with the fit checklist above, and you’ll have a safer, longer-lasting ride for the whole season.
Related reading
- Wholesale 12V Ride On Toys: A Dad's Guide to Buying in Bulk
- Used 12V Ride On Toys: A Dad's Guide to Buying Safely (2026)
Ready to choose one?
About Emily Parker
Emily Parker is part of our editorial team and reviews and edits our dad-focused parenting guides, checking product details against manufacturer specifications and owner feedback.