By Emily Parker
Updated November 2026
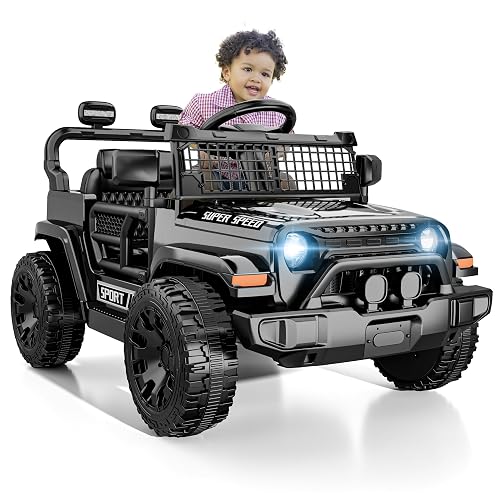
A fast ride on toy is any battery-powered or pedal-driven vehicle that can top out at a speed that makes a parent’s heart skip, and most of them are fine when they’re matched to the right rider. This guide walks you through how to read speed specs, how to pick a top speed that fits your kid’s age and coordination, and how to set up a ride-on so it stays fun instead of frightening. By the end, you’ll know exactly which features matter and which marketing numbers you can safely ignore.
Understanding What “Fast” Means on a Ride-On
Manufacturers list top speed in miles per hour, but that number is measured under ideal conditions: a fully charged battery, a light rider, flat pavement and no wind. Real-world speed on grass, gravel or a slight incline will be lower, and a heavier child or a low battery will drop it further. Treat the listed top speed as a ceiling, not a typical cruising speed. If you want more background, see 16v Ride On Toys: A Dad's Step-by-Step Guide to Choosing the Right One (2026).
Shopping for one? See our guide: 5 Best 24v Ride On Toys for Big Yards and Long Rides: Buyer's Guide (2026).
Most ride-ons fall into three rough speed bands. Low-speed models, often around 1 to 2 mph, are built for toddlers who are still learning to steer and stop. Mid-range models, usually in the 2 to 4 mph band, suit kids who can walk confidently and follow simple rules. Higher-speed units, commonly 5 mph and up, are designed for older children with good balance and judgment. Some manufacturers specify top speeds well above these levels, and those units are better suited to supervised use on private property than to a typical backyard.
Step 1: Match the Top Speed to Your Child
Speed is only safe when the rider can control it. Before you compare models, look at where your child actually is developmentally. A good rule of thumb: if your child can’t yet walk steadily while holding a moving object, start in the low-speed band. If they can run, turn quickly and stop on command, a mid-range unit is a reasonable next step.
Questions to Ask Yourself
- Can my child reliably release the pedal or throttle on their own?
- Do they stop when told, even when excited?
- Can they keep both hands on the steering wheel or handlebars for several minutes?
- Do they understand that the vehicle goes where they steer it, not where they wish it would go?
If you answered no to two or more of these, choose a slower model and revisit the question in six months. Kids grow fast, and a model that felt scary in spring may feel tame by fall.
Step 2: Check the Speed Control System
Top speed matters less than how the vehicle lets a rider slow down. Look at these features before anything else:
- Speed limiter or speed switch. Many electric ride-ons have a low/high switch or a dial that caps top speed. This lets you start at the lower setting and unlock more speed as your child improves.
- Soft-start acceleration. A vehicle that eases into motion is far less jolting than one that lurches forward when the pedal is touched.
- Automatic braking. Good units brake when the throttle is released. Cheaper models may coast a long way, which is a problem on any slope.
- Parent remote. A parent-controlled remote lets you start, stop and cap speed from a distance. This is the single most useful safety feature for toddlers.
Step 3: Set Up the Riding Area
A fast ride on toy performs very differently on different surfaces. Before the first ride, walk the route your child will use and note the following:
- Flat, smooth surfaces such as a driveway, patio or sidewalk give the most predictable speed.
- Grass and gravel slow the vehicle and can cause it to tip if the wheels catch on uneven ground.
- Any slope, even a gentle one, can push a ride-on past its intended speed.
- Keep the route clear of stairs, pools, driveways with traffic, and anything a child could hit at speed.
Mark a boundary with cones or flower pots, and set a rule that the rider stays within it. Kids respond well to visual limits.
Tools and Supplies Worth Having
- A tape measure to set safe boundary distances
- Bright cones or markers to define the riding zone
- A fully charged battery and the manufacturer’s charger
- Helmet, closed-toe shoes and gloves for the rider
- A small first-aid kit within reach
Step 4: Teach Safe Riding Habits Before Full Speed
Start every new ride-on in a controlled setting. Let your child practice at the lowest speed for several short sessions. Walk alongside at first. Practice starting, steering, stopping and turning around. Once they can do all four without help, you can move to a higher speed setting, still under supervision.
Set three non-negotiable rules: always wear a helmet, never ride near the street or water, and stop immediately when you say stop. Repeat them every time, and be consistent. A rule that applies only some of the time is a rule kids will test.
Charging and Maintenance
Battery condition affects both speed and braking. Charge after every few rides and never leave a battery sitting at zero. Store the vehicle somewhere cool and dry, not in a hot garage in summer. Check tire pressure if the model uses pneumatic tires, and tighten any loose bolts on the steering column monthly.
Common Mistakes Dads Make With Fast Ride-Ons
- Buying for the next age up. A vehicle that’s too fast for your child will feel exciting for a week and dangerous for a year.
- Trusting the top speed number alone. Test the braking and steering before judging whether a model is safe.
- Skipping the helmet. Falls at low speed still cause head injuries.
- Letting kids ride unsupervised early on. Even a confident rider can misjudge a slope or a corner.
- Ignoring the weight limit. An overloaded motor runs hot and loses control.
- Riding on public roads. Most ride-ons are not designed for traffic, and drivers often can’t see small vehicles.
Tips for Getting the Most Out of Fast Rides
- Use the lowest speed setting that still feels fun. Kids rarely complain about a slower vehicle once they’re having a good time.
- Build a short obstacle course with cones to practice turning and stopping. It keeps speed in check while sharpening skills.
- Take turns with siblings or friends so everyone rides at a comfortable pace.
- Keep a simple log of when you change speed settings. It helps you see progress and avoids unlocking speed too quickly.
- Check the manufacturer’s manual for the recommended age range and follow it, even if your child seems ready for more.
Recommended gear
A helmet is the most important piece of gear for any fast ride on toy. Look for a child-sized helmet that meets the CPSC standard for bicycles or skating, and fit it so it sits level and snug with no more than a finger’s width above the eyebrows.
A parent remote, often included with higher-end electric ride-ons, lets you stop the vehicle instantly from a distance. If your model doesn’t include one, check whether the manufacturer offers it as an add-on.
Knee and elbow pads help on pavement, where falls are more likely to scrape skin. Choose a set with a secure strap so they stay put during quick turns.
Cones or marker flags make it easy to set a clear riding boundary in the yard. Bright colors help small kids remember where the line is.
FAQ
What top speed is safe for a toddler on a ride-on?
Most toddlers do best at speeds around 1 to 2 mph, with the speed limited by a switch or dial. Move up only after your child can steer, stop and follow rules reliably.
Can I trust the listed top speed?
Treat it as a maximum under ideal conditions. Real speed is often lower on grass, slopes or with a heavier rider or a low battery.
Do fast ride-ons need a helmet?
Yes. Head injuries can happen even at low speeds, so a properly fitted helmet should be worn every time.
Is a parent remote worth it?
For young or newly riding children, yes. It lets you stop the vehicle instantly, which is the most important safety control you can have.
How do I know when to increase the speed setting?
Increase speed only when your child consistently stops on command, steers accurately and keeps both hands on the controls. Make the change in a controlled space with you present.
Can older kids use fast ride-ons on the street?
Most ride-ons are not designed for public roads. Keep riding to private property, away from traffic, and check local rules for any vehicle type.
How do I keep the battery in good shape?
Charge regularly, avoid letting it run completely flat, and store the vehicle somewhere cool and dry. Follow the manufacturer’s charging instructions closely.
Should I consult a professional before buying?
If your child has balance, vision or medical concerns, talk with your pediatrician or physical therapist before choosing a fast ride-on, since they can recommend an appropriate speed and type.
Conclusion
A fast ride on toy can be a great source of outdoor fun when the speed matches the rider. Start with a low setting, teach stopping and steering before anything else, and keep a helmet on every time. Move up in speed only as your child earns it, and the ride will stay exciting for both of you.
Related reading
- Tractor Ride On Toys: 6 Best Picks for Toddlers and Big Kids (2026)
- Top 7 Ride On Toys for Five Year Olds Compared (2026)
- Top 6 Childrens Electric Ride On Toys for Toddlers and Big Kids
- Top 5 Ride On Toys Car Picks for Toddlers and Big Kids
- Ride on Toys 12 Volt: How to Choose the Right One for Your Toddler (2026)
Ready to choose one?
About Emily Parker
Emily Parker is part of our editorial team and reviews and edits our dad-focused parenting guides, checking product details against manufacturer specifications and owner feedback.